Your latest mix is the only resume that actually matters in the electronic music industry. 🎧 You’ve spent hours digging for the perfect tracks and perfecting your transitions, but you need to know how to record a high-quality DJ mix to make that effort count. A single digital clip or a muddy low end can instantly derail your professional momentum. It’s frustrating when your energy in the booth doesn’t translate to the file on your USB. We’ve all been there; dealing with complicated software routing or unexpected background noise that ruins a perfect take.
You deserve a recording that captures every nuance of your sound. This guide reveals the exact technical steps and professional secrets to recording a flawless, club-ready set that gets you booked. 🚀 Master the art of gain staging, hardware optimization, and the technical workflows used by the world’s top artists. Crystal-clear WAV files. 💎 Professional 4K video content. 🎥 Total confidence when sending your work to promoters. ⚡️ Let’s turn your performance into your biggest professional breakthrough yet.
Key Takeaways
- Identify your specific recording goals and select professional hardware to lock in a club-standard signal from the first beat.
- Master the technical side of gain staging to learn exactly how to record a high-quality DJ mix with the perfect amount of headroom.
- Compare internal software recording against external audio interfaces to determine the best path for maximum sonic fidelity.
- Combine your audio with 4K video and optimized acoustics to create the high-impact visual content promoters demand in 2026.
- Finalize your set with essential post-production and metadata tagging to ensure your file is polished and ready for global platforms.
Mastering the Fundamentals: What You Need to Record
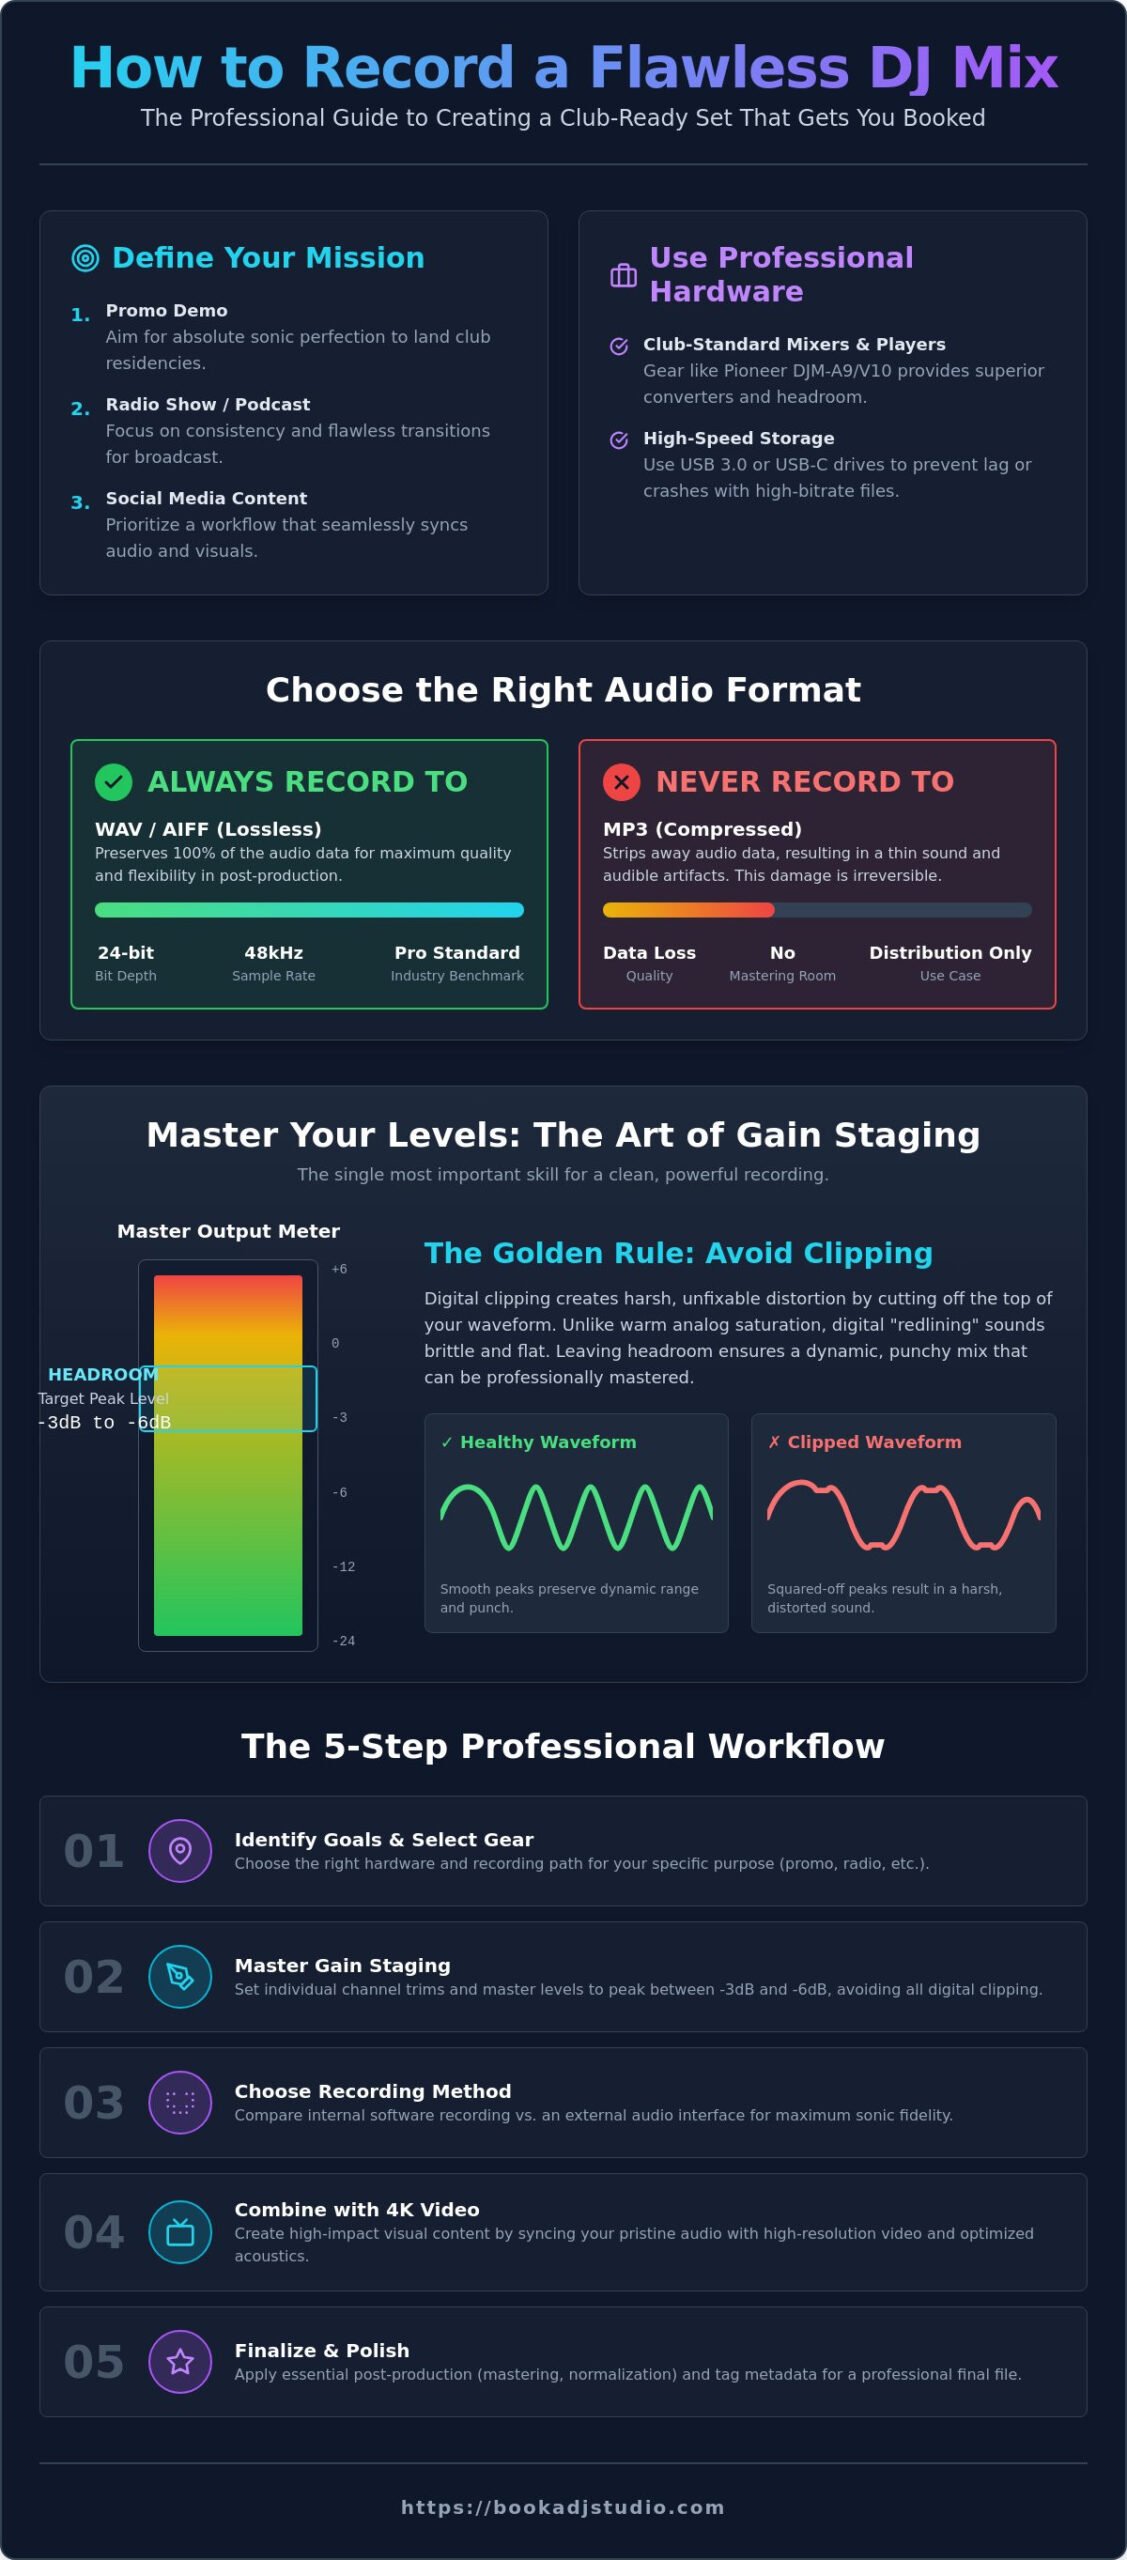
Your journey to the main stage begins with a single, perfect recording. To understand how to record a high-quality DJ mix, you must first define your mission. Are you building a promo demo to land a club residency? Maybe you’re crafting a flawless radio show or capturing high-energy clips for social media. Each goal requires a different mindset. A promo demo needs absolute sonic perfection, while social media content demands a workflow that syncs audio and visuals seamlessly. Before you touch a fader, ground yourself in the fundamentals of sound recording to ensure your creative vision isn’t lost in technical static.
To better understand the physical setup required for a pro-level capture, watch this helpful video:
Hardware is the beating heart of your sound. In 2026, the industry standard remains Pioneer CDJs and high-end mixers like the DJM-A9 or V10. These units provide the cleanest signal path and superior digital-to-analog converters. Don’t let slow technology bottleneck your talent. Always use high-speed USB 3.0 or USB-C drives. Modern sets involve high-bitrate files and real-time stem separation; a cheap drive will cause lag or, worse, a mid-set crash. ⚡️
Club-Standard Hardware vs. Home Controllers
Entry-level controllers are great for practice, but they often lack the sophisticated sound processing found in professional DJ equipment. Pro mixers offer better headroom and circuitry designed to handle extreme frequencies without breaking a sweat. This prevents the “thin” sound and digital artifacts that can ruin a recorded file. Plus, the tactile weight of professional gear encourages a more dynamic, confident performance. You play better when the gear feels like an extension of your soul. 🎹
Choosing the Right Audio Format
Never record directly to MP3. This is a rookie mistake that can’t be fixed later. MP3 is a compressed format that strips away the richness of your tracks. Always choose lossless formats like WAV or AIFF. Aim for a minimum of 24-bit depth and a 48kHz sample rate. This is the professional benchmark for 2026. It gives you the “thickness” in the low end and the crispness in the highs that promoters expect. 💎
- ✅ WAV/AIFF: Essential for post-production and mastering.
- ✅ 24-bit/48kHz: The sweet spot for dynamic range.
- ❌ MP3: Avoid for recording; use only for final distribution.
Dialing in the Perfect Signal: Gain Staging and Levels
Stop redlining. It’s the ultimate amateur move. When you’re figuring out how to record a high-quality DJ mix, your meters are your best friends. Digital clipping is brutal; it creates harsh, unfixable distortion that makes listeners turn off your set in seconds. Unlike analog gear that adds “warmth” when pushed, digital systems simply cut off the top of the waveform. This results in a flat, exhausting sound that lacks the punch and clarity required for a professional demo. You want your kicks to thump and your hats to sizzle, not crackle. 🔊
The golden rule for a club-ready file is simple: leave space to breathe. Aim for a peak level between -3dB and -6dB on your recording meter. This is called headroom. It gives you the necessary margin for a professional master later on. If your signal is already hitting 0dB or higher, you’ve left no room for enhancement. Check your trim on every single track. Tracks are mastered at different volumes; you must balance their individual gains before they ever hit the master fader. Keep your eyes on the meters during every transition. 🎚️
The Science of Gain Staging
Think of proper gain staging as the clean path your audio takes from the digital file to the final recording. Set your channel gains so the loudest parts of the track sit comfortably in the yellow, never the red. Remember that your mixer’s master volume often dictates the signal sent to your recording software. If you’re pushing the master too hard to hear yourself in the room, you might be clipping your internal recording without even knowing it. Monitor your levels in real-time on your laptop screen or recorder to avoid heartbreaking surprises. 📈
Avoiding Common Level Pitfalls
Never rely on the “fix it in post” myth. You cannot un-clip audio once the data is lost. If your recording is distorted, it’s garbage. Period. Use limiters sparingly; they should be a safety net, not a tool to make your mix louder. If you squash your dynamics too much, your drops will lose their impact and sound small. Calibrate your setup before you hit record. Ensure that what you see on your mixer matches what your software is receiving. If you want to ensure your signal is pristine, consider booking a session with pro-grade audio recording tools that take the guesswork out of the equation. ⚡️
- ✅ Target Headroom: -3dB to -6dB.
- ✅ Visual Check: Monitor meters on both hardware and software.
- ❌ Redlining: If it’s red, it’s wrong.
Choosing Your Recording Method: Internal vs. External Gear
Your signal is dialed. Your tracks are ready. Now you need to decide where that sound actually lives. Choosing your recording method is the final technical hurdle in mastering how to record a high-quality DJ mix. You have two main paths: staying inside the box or going external. Both have their place; however, only one offers the absolute reliability of a professional tour setup. Your choice defines the bridge between a fleeting live performance and a permanent career asset. 🌉
Internal recording in Rekordbox, Serato, or Traktor is the most common starting point. It’s the “one-click” solution. You don’t need extra cables, and the file is saved directly to your hard drive. But convenience comes with a cost. Relying solely on your performance laptop is a calculated risk. Modern DJ software is incredibly resource-heavy. If you’re using real-time stem separation or recording 4K video simultaneously, your CPU is under immense pressure. A single background process or system update can cause a micro-stutter in your audio. For a practice session, it’s fine. For a career-defining promo, you need a backup. 💻
Software Recording Pros and Cons
The biggest pro is metadata. Software recordings often tag your tracks automatically. The con? CPU-related audio glitches. If you choose this route, optimize your laptop. Disable Wi-Fi. Close all other apps. Set your recording path to a fast, internal SSD rather than a slow external drive. This minimizes the chance of write-speed bottlenecks ruining your set. ⚡️
The External Interface Advantage
If you want the absolute highest fidelity, use a dedicated audio interface. This allows you to capture the specific sonic character of your mixer’s converters. Route your master output into a dedicated DAW like Ableton Live or Audacity on a separate computer. This is the gold standard for professional DJ set recording. It isolates your recording process from your performance software, ensuring that a software crash won’t kill your file. 💎
Don’t overlook the power of handheld recorders. Devices like the Zoom H4n or Tascam DR-40X are bulletproof. They don’t have operating system updates or background tasks. They just record. Connect one to the “Record Out” or “Session Out” of your mixer for a clean, independent backup. Many modern Pioneer mixers also offer direct-to-USB recording. Plug a dedicated thumb drive into the top-panel USB port and capture a pristine 24-bit WAV file without a single extra cable. 🎤
- ✅ Direct-to-USB: The cleanest, most convenient hardware backup.
- ✅ External Interface: Best for high-end mastering and “warm” analog sound.
- ✅ Handheld Recorders: The “set and forget” safety net for live sets.
- ❌ Single-Laptop Recording: Risky for high-stakes professional demos.
Elevating Your Content with 4K Video and Studio Acoustics
Audio is only half the story. In 2026, social media platforms like TikTok and Instagram Reels are the undisputed kings of DJ discovery. If you want to know how to record a high-quality DJ mix that actually goes viral, you must think in 4K. A static, grainy phone recording won’t cut it anymore. Promoters want to see your technique, your energy, and your professional environment. High-end visual content proves you’re ready for the big stages. 🎥
Your environment dictates your output. Home recordings are often plagued by unwanted background noise or flutter echoes from untreated walls. These acoustic issues don’t just ruin your recording; they sabotage your performance. If you can’t hear your transitions clearly through your monitors, you’ll make EQ mistakes that are impossible to hide in the final file. A sound-treated studio eliminates the guesswork. It provides a surgical listening environment where every kick and snare is perfectly defined. 🔊
Why Environment Matters
The psychological shift is real. When you step into a professional booth, your mindset changes. You stop being a bedroom hobbyist and start being a headliner. Professional monitoring allows you to catch subtle phasing issues or clashing frequencies in real-time. This level of clarity is why top-tier artists refuse to record promos in untreated spaces. Take a look at our studio gallery to see the kind of optimized environment that breeds success. ⚡️
Integrating 4K Video into Your Set
Multi-cam setups are the 2026 gold standard. Capture the intricate details of your hand movements on the decks, the wide shot of your stage presence, and the raw vibe of the room. Lighting is your secret weapon. Even a dark and moody aesthetic requires professional-grade fixtures to ensure your 4K footage remains crisp and noise-free. 💎
Syncing audio and video is the final step. Use a clapper or a sharp sound at the start to align your high-fidelity WAV file with your video timeline perfectly. Watching yourself back is also the fastest way to improve. Analyze your stage presence. Are you engaging with the crowd or just staring at your laptop? Refine your brand. If you’re ready to stop making excuses and start making an impact, book your 4K video recording session today and let your talent shine. 🚀
- ✅ 4K Resolution: The mandatory standard for 2026 discovery.
- ✅ Sound Treatment: Eliminates background noise and muddy monitoring.
- ✅ Multi-Cam: Showcases technique and stage presence simultaneously.
- ❌ Phone Audio: Never use internal phone mics for professional promos.
Post-Recording Polish: Mastering and Promoting Your Set
The recording light is off. You’ve nailed every transition and the energy was peak. But the work doesn’t stop when the music ends. Learning how to record a high-quality DJ mix is only part of the battle; the other half is the polish you apply before the world hears it. This is where you transform a raw capture into a commercial asset that promoters actually want to hear. 💎
Basic post-production is non-negotiable. Start by trimming the silence at the beginning and end of your file. Use normalization to bring your highest peak to -1.0 dB. This ensures your mix sounds consistent with other professional sets without clipping. Apply a light limiter to catch occasional stray peaks, but be careful. If you over-compress, you’ll lose the punch of your kicks and the sparkle of your highs. A professional mix needs to breathe to sound powerful on a club system. 🔊
The Final Audio Touch
Think of your mastering chain as the final coat of gloss. Use a subtle EQ to clean up any boxy low-mids or to add a tiny bit of air to the top end. Always test your work on multiple systems. Listen in your car. Use your studio headphones. Play it on a cheap Bluetooth speaker. If the balance holds up across all three, you’ve succeeded. Remember, a mix that sounds great in a treated studio might need slight adjustments to translate well to consumer earbuds. 🏎️
Launching Your Mix to the World
Your file needs a professional identity. Don’t upload a file named “Mix_Final_V2.wav”. Use a clear, searchable naming convention: Artist Name – Mix Title (Genre or Series). Add high-resolution artwork that reflects your brand aesthetic. Metadata is your digital fingerprint; it helps platform algorithms categorize your sound and suggest it to the right listeners. 🎨
Choose your platforms based on your goals. YouTube is the undisputed home for your 4K video content. Use Mixcloud if you want total peace of mind regarding music licensing and tracklists. SoundCloud remains the heart of the DJ community for engagement. Once uploaded, don’t just post a link and disappear. Cut 15 to 30 second snippets of your best transitions or high-energy drops. Post these to TikTok and Instagram Reels to create a content funnel that drives traffic to the full set. 🚀
Your journey from the bedroom to the booth depends on the quality of the content you put out. If you’re ready to stop guessing and start delivering club-standard results, it’s time to step up your game. Ready to record? Book your professional session now! and let’s get your sound heard. ⚡️
- ✅ Normalization: Bring your levels to -1.0 dB for a loud, clean signal.
- ✅ Metadata: Always include a full tracklist and professional artwork.
- ✅ Social Snippets: Use your 4K video to create high-impact Reels and TikToks.
- ❌ Over-Compression: Don’t kill your dynamics just to be the loudest file on the cloud.
Step Into the Booth and Claim Your Future
You’ve mastered the technical signal chain. You understand why headroom is your best friend and why 4K video is the bridge to your next big booking. Mastering how to record a high-quality DJ mix isn’t just about pushing buttons; it’s about respecting the craft. You now have the blueprint to move from a bedroom hobbyist to a professional with a polished, club-ready demo that demands attention. 🎧
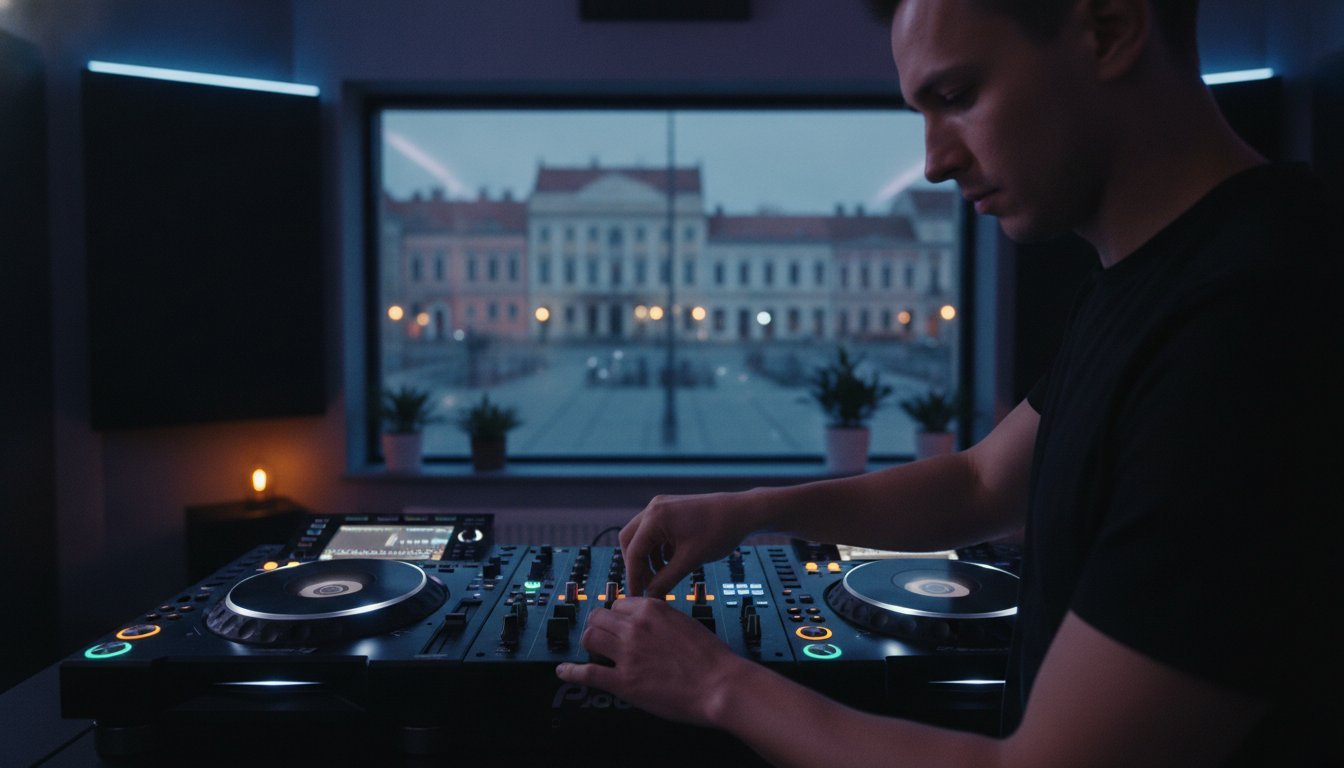
Stop battling home acoustics and entry-level gear. We’ve built the ultimate environment to launch your career. Our studio features top-tier Pioneer DJ equipment and a sound-treated professional environment where your sound finally matches your ambition. Capture every transition with our 4K multi-cam video recording to create the high-impact content your brand deserves. 🚀
Your breakthrough is one perfect recording away. Don’t let technical limitations or background noise hold back your talent. Book Your Professional DJ Recording Session in Timișoara and let the world hear what you’re truly capable of. The stage is set. It’s time for your performance. ⚡️
Expert Answers for Your Perfect Mix
How do I stop my DJ mix from sounding distorted?
Stop the distortion by lowering your channel trim and avoiding the red LEDs on your mixer. Digital clipping occurs when your signal exceeds 0dB, creating unfixable harshness in the audio data. Keep your levels consistently in the yellow zone. This ensures your tracks maintain their dynamic range and clarity. Always monitor your software recording meter alongside your hardware to catch hidden peaks before they ruin your take. 🎚️
What is the best file format for recording a DJ set in 2026?
The industry standard for 2026 is a 24-bit/48kHz WAV or AIFF file. Lossless formats are essential because they preserve every frequency and detail of your performance. Never record directly to MP3; it strips away the depth of your low end and the crispness of your highs. You can always convert a high-quality file to a smaller format later, but you can’t add quality back to a compressed recording. 💎
Can I record a high-quality mix using only my laptop?
You can record a mix using only your laptop, but it puts significant strain on your CPU. Running modern DJ software while recording high-bitrate audio increases the risk of micro-glitches or system crashes. To understand how to record a high-quality DJ mix with total reliability, consider using a dedicated external recorder. This isolates the recording process and guarantees a flawless file even if your performance software stutters. 💻
How much headroom should I leave when recording my mix?
Leave between -3dB and -6dB of headroom on your master recording meter. This gap prevents accidental clipping during high-energy transitions when two tracks are playing simultaneously. It also provides the necessary space for post-production mastering to boost your volume safely. Proper headroom is the mark of a professional who understands that a slightly quieter, clean recording is always better than a loud, distorted one. 📈
Is it better to record internal software audio or external mixer audio?
External recording is superior for professional promos because it captures the specific sonic character of the mixer’s high-end converters. Internal software recording is convenient for quick practice sessions, but it’s prone to digital artifacts if your laptop’s buffer size isn’t perfectly optimized. Professionals prefer routing the mixer’s master out into a dedicated audio interface to ensure the highest possible fidelity and a bulletproof backup. 🔌
How do I sync my DJ audio with a video recording?
Sync your audio and video by creating a clear “sync point” at the start of your set, such as a sharp snare hit or a visual clap. In your video editing software, align the visual peak of that action with the corresponding waveform peak in your high-quality WAV file. This ensures your hand movements on the decks match the music perfectly. Precision here makes your promotional content look and feel truly professional. 🎬
What equipment do I need to record a professional-grade promo set?
You need a club-standard mixer, high-speed USB 3.0 drives, and a reliable recording device like an audio interface or handheld recorder. Using professional gear ensures your signal path remains clean and free of unwanted noise. For the best results, record in a sound-treated environment where you can hear your EQs and transitions with surgical clarity. This professional setup allows you to focus entirely on your creative flow. 🎧
Why does my recorded mix sound quieter than professional sets on SoundCloud?
Your mix sounds quieter because professional sets have undergone normalization and light mastering. Raw recordings are intentionally kept at lower levels to provide headroom and avoid clipping. To fix this, use a limiter and normalization in post-production to bring your highest peaks to -1.0dB. This process safely boosts the overall loudness of your mix, allowing it to compete with top-tier sets while maintaining its punch. 🔊